Managing Repos
Once your Arraylake organization has been fully configured and you have installed the client library, you're ready to start managing data! 🎉
Create a Repo
For the purposes of this example, our org name will be earthmover.
If running these commands interactively, replace earthmover with your org name.
For this example, we are going to create a Repo called ocean to hold oceanography data 🌊.
- Web App
- CLI
- Python
- Python (asyncio)
Navigate to your org's home page (for the org called earthmover this is https://app.earthmover.io/earthmover), then click New Repository.

The new repository button.
Type in the desired Repo name and hit Create.
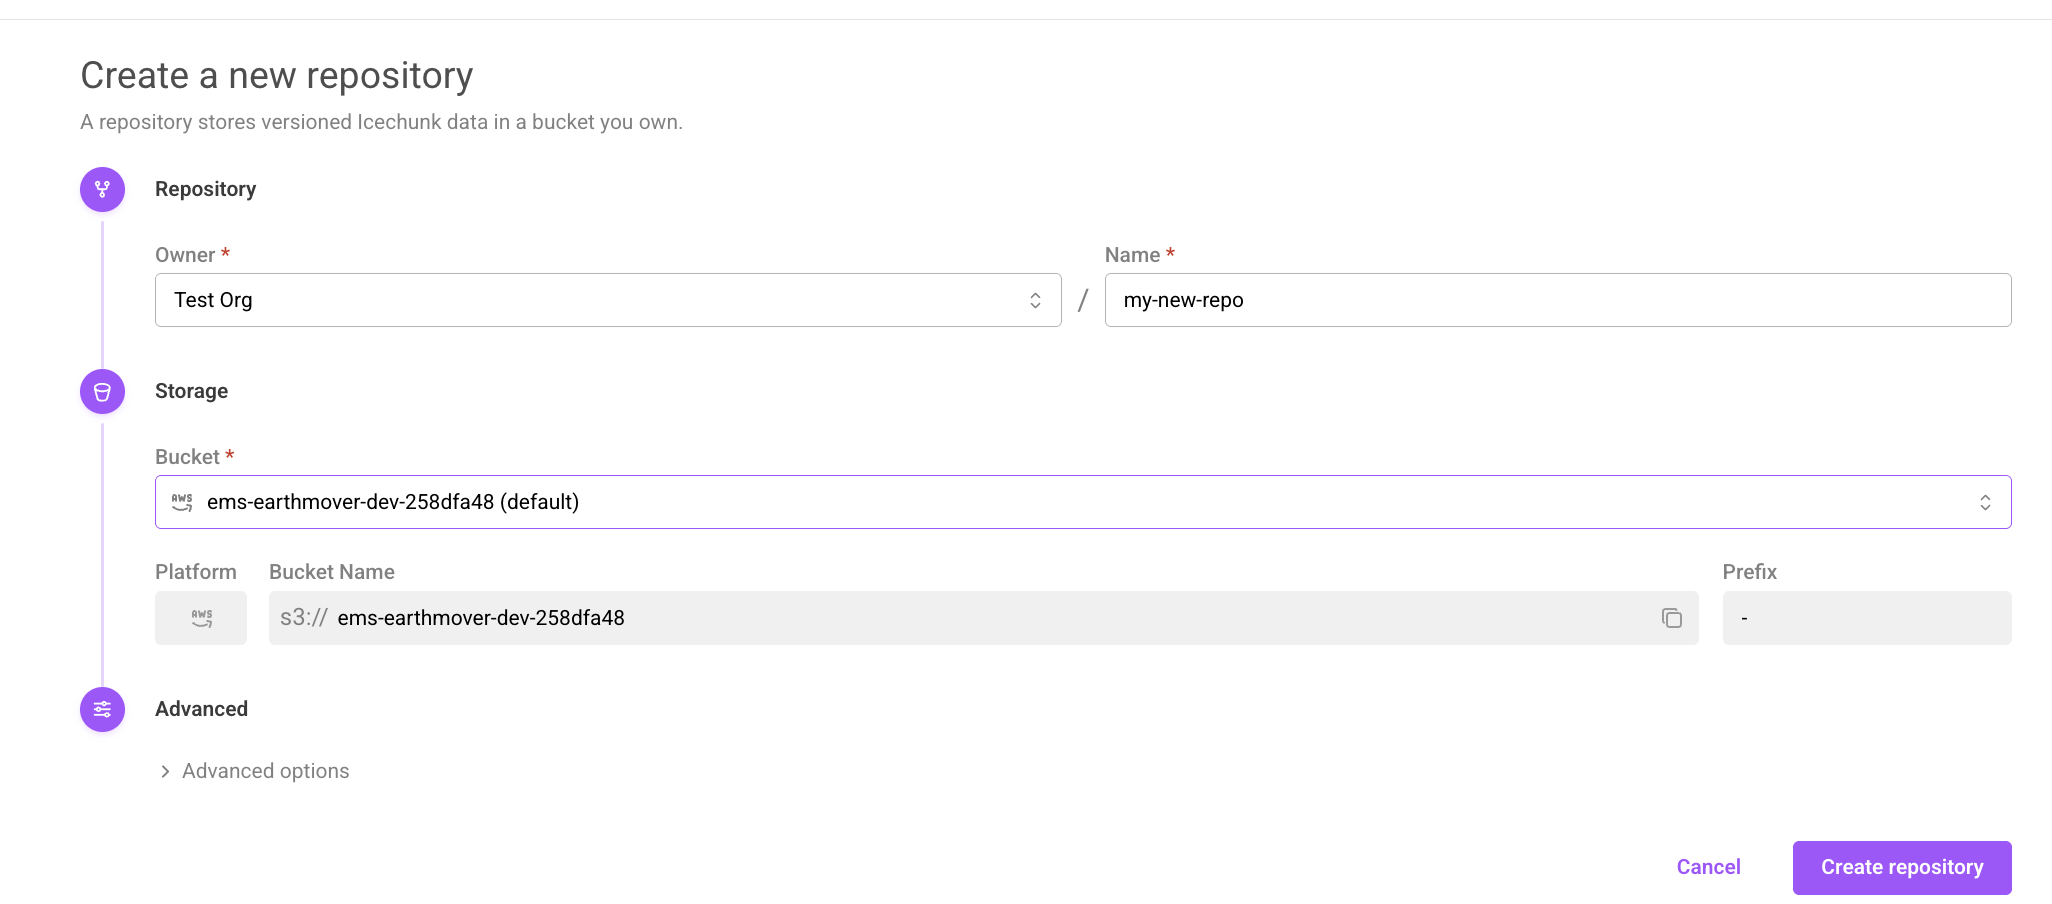
The create repository form.
arraylake repo create earthmover/ocean
from arraylake import Client
client = Client()
client.create_repo("earthmover/ocean")
from arraylake import AsyncClient
aclient = AsyncClient()
await aclient.create_repo("earthmover/ocean")
You can optionally add a repo description and/or metadata to your repo. Descriptions are limited to 255 characters, while repo metadata can be at most 4kB total. Metadata must be a mapping of key-value pairs where values are strings, numbers, lists, booleans, or None.
- CLI
- Python
- Python (asyncio)
arraylake repo create earthmover/ocean \
  --description "This is some oceanography data!" \
  --metadata '{"type": ["climate", "coastal",
    "environmental"], "model": "FVCOM"}'
from arraylake import Client
client = Client()
client.create_repo(
    "earthmover/ocean",
    description="This is some oceanography data!",
    metadata={
        "type": ["climate", "coastal",
                 "environmental"],
        "model": "FVCOM"
    }
)
from arraylake import AsyncClient
aclient = AsyncClient()
await aclient.create_repo(
    "earthmover/ocean",
    description="This is some oceanography data!",
    metadata={
        "type": ["climate", "coastal",
                 "environmental"],
        "model": "FVCOM"
    }
)
You can also modify the description and/or metadata of an existing repo.
- CLI
- Python
- Python (asyncio)
arraylake repo modify earthmover/ocean --description "This is an updated description for some oceanography data!" -a '{"source": "NOAA"}' -r "type" -u '{"model": "ROMS"}'
from arraylake import Client
client = Client()
client.modify_repo(
    "earthmover/ocean",
    description="This is an updated description for some oceanography data!",
    add_metadata={"source": "NOAA"},
    remove_metadata=["type"],
    update_metadata={"model": "ROMS"}
)
from arraylake import AsyncClient
aclient = AsyncClient()
await aclient.modify_repo(
    "earthmover/ocean",
    description="This is an updated description for some oceanography data!",
    add_metadata={"source": "NOAA"},
    remove_metadata=["type"],
    update_metadata={"model": "ROMS"}
)
Where is Repo data stored?
Arraylake lets you configure the storage location for a Repo's data using org-level bucket configurations.
Choose a specific bucket by providing bucket_config_nickname to create_repo.
If not specified, the organization's default bucket is used.
Within the bucket and prefix set by a org-level bucket configuration, data for new Icechunk Repos are stored within another prefix.
By default, the extra prefix is set to Repo name prefixed with 8 random characters.
Choose a specific extra prefix by passing the prefix kwarg to create_repo.
For example, for a bucket configured with bucket='my-bucket-name' and prefix='my-bucket-prefix',
create_repo("repo-A")stores data inmy-bucket-name/my-bucket-prefix/[8-RANDOM_CHARACTERS]_repo_Acreate_repo("repo-B", prefix='zoo')stores data inmy-bucket-name/my-bucket-prefix/zoo/
Import an existing Icechunk Repo
You can also import an existing Icechunk Repository into Arraylake.
You'll need a bucket configuration for the bucket in which your Icechunk Repository is stored.
Let's imagine you created a bucket config with nickname my-bucket, and your bucket contains an Icechunk Repository under the compound prefix my-bucket_prefix/my-icechunk-prefix.
- Web App
- CLI
- Python
- Python (asyncio)
Hit the New Repository button as before, and then open the Additional Settings box.
Check the Import Existing Repository button, and type in the prefix under which your Icechunk repo is stored.
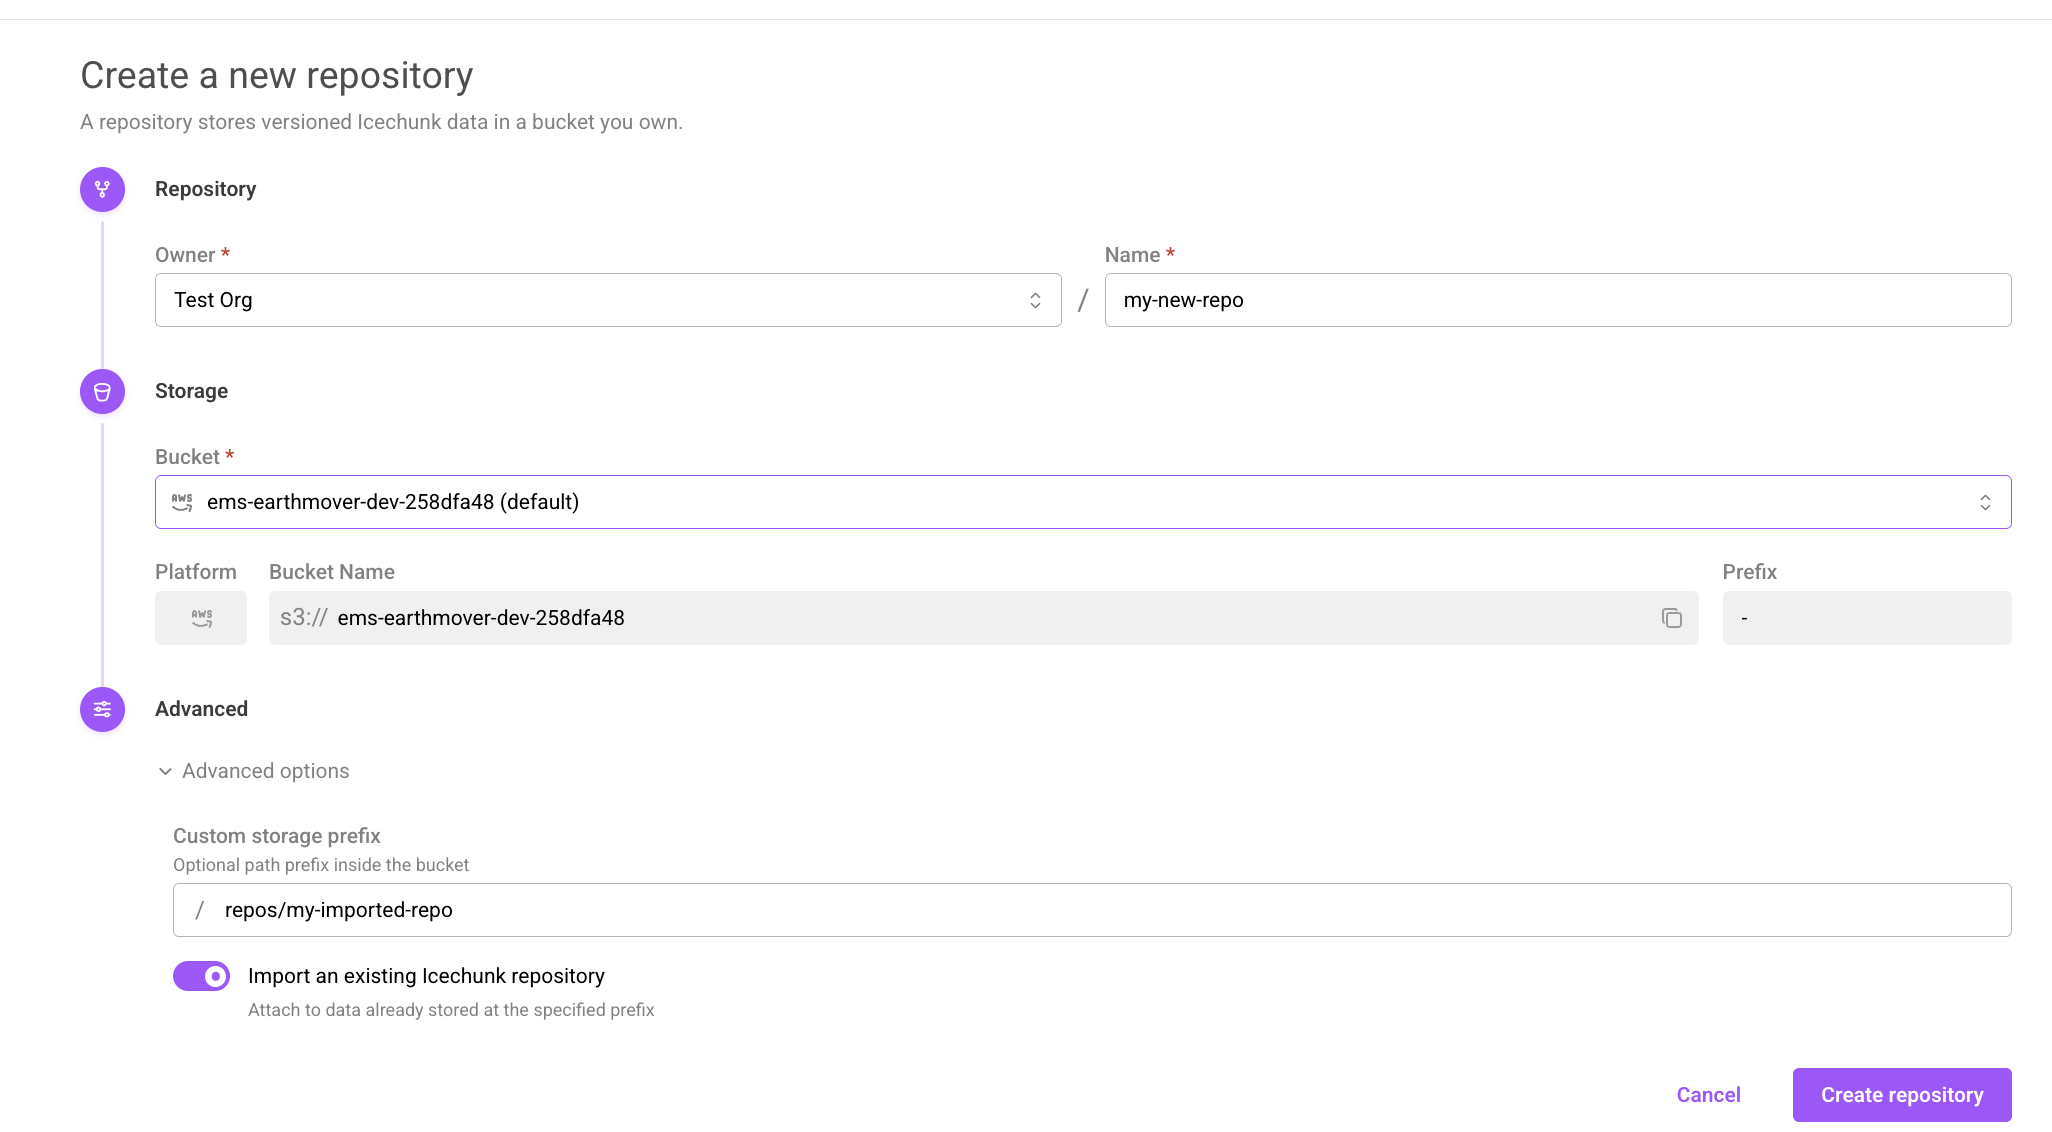
Importing an existing Icechunk repository in the web app.
arraylake repo import earthmover/ocean --bucket-config-nickname my-bucket --prefix my_icechunk_prefix
from arraylake import Client
client = Client()
client.import_repo(
    "earthmover/ocean",
    bucket_config_nickname="my_bucket",
    prefix="my-icechunk-prefix",
)
from arraylake import AsyncClient
aclient = AsyncClient()
await aclient.import_repo(
    "earthmover/ocean",
    bucket_config_nickname="my_bucket",
    prefix="my-icechunk-prefix",
)
Repo metadata and descriptions can be set in the same way as when creating a repo from scratch.
If your existing Icechunk Repository contains virtual chunks, this requires an additional configuation step - see the docs on virtual chunks.
Import a Zarr store
You can create a new Icechunk Repository from an existing native Zarr store without copying any data. Arraylake scans the source store and records virtual chunk references that point at the original Zarr chunks in place, then commits them to a brand-new Icechunk Repository. The original store is left untouched, and no chunk data is duplicated.
You'll need:
- A bucket configuration for the bucket that holds the source Zarr store. The source bucket must use delegated credentials or anonymous (public) access — HMAC buckets can't be used as a virtual chunk source.
- A destination bucket configuration for the new Repository. This can be the same bucket as the source, or a different one.
- Web App
- Python
From your organization's home page, open the Create Repository menu and choose Import Zarr store. Then fill in:
- Repository — the name (and optional description) for the new Repository.
- Source Zarr store — the bucket configuration and prefix where the existing Zarr store lives.
- Destination — the bucket configuration (and optional prefix) where the new Icechunk Repository will be created.
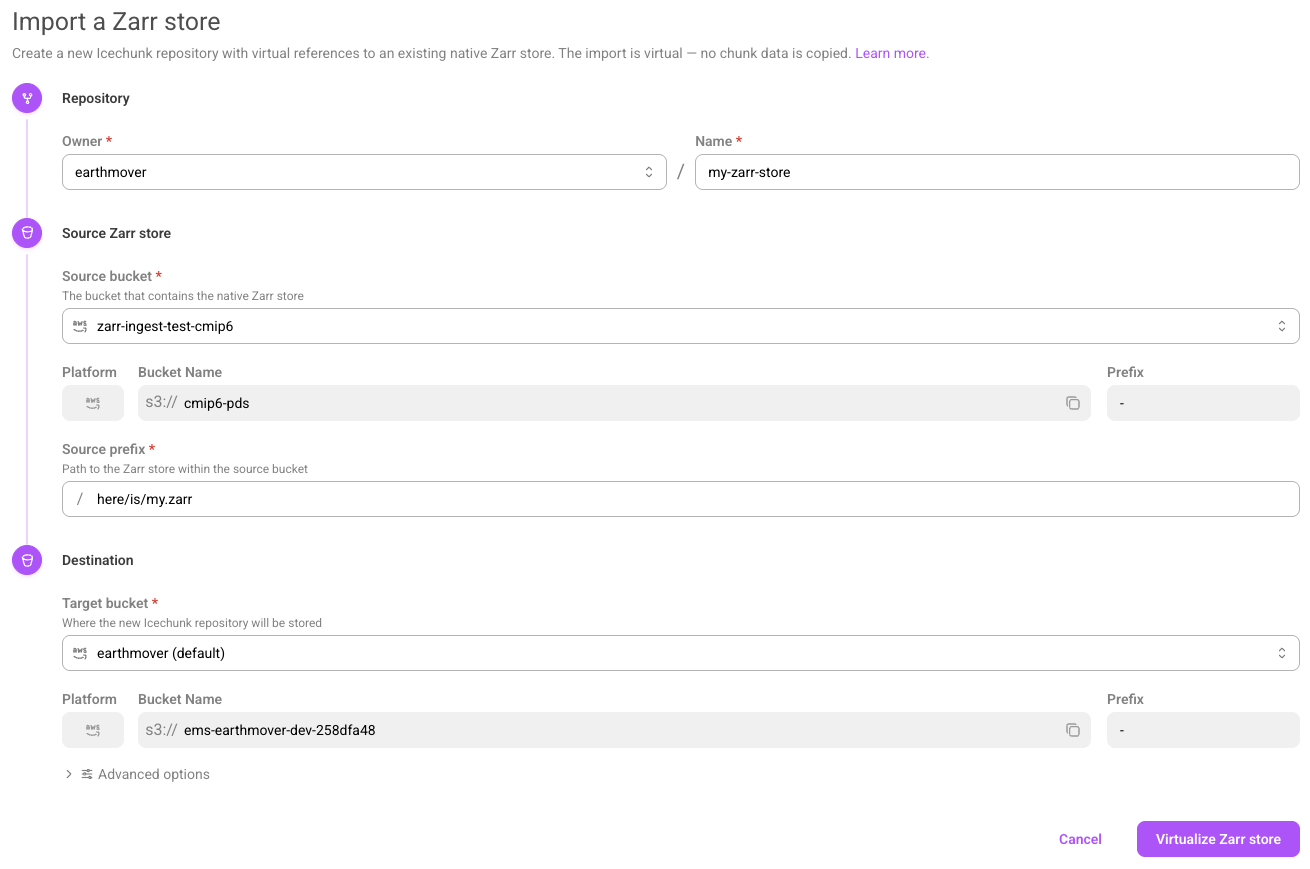
Importing a Zarr store in the web app.
Submit the form to start the import. Arraylake runs the ingestion in the background and shows its progress; when it finishes, the new Repository is ready to open like any other. Very large stores may be rejected if they exceed the virtual-chunk limit.
The web app runs the steps below for you; you can also drive them directly with the Python client and VirtualiZarr. This requires the obstore extra: pip install 'arraylake[obstore]'.
Suppose the native Zarr store lives at s3://source-bucket/path/to/store.zarr, and you've registered that bucket as the bucket config my-zarr-source.
First, authorize your org to read virtual chunks from the source store. Keep the policy private (public=False) unless you intend to share the referenced data (e.g. via a marketplace listing):
from arraylake import Client

client = Client()

client.set_virtual_chunk_access_policy(
    org="earthmover",
    bucket_nickname="my-zarr-source",
    subprefix="path/to/store.zarr",
    public=False,
)
Create the new Repository, authorizing the source bucket as a virtual chunk container:
ic_repo = client.create_repo(
    "earthmover/my-zarr-store",
    bucket_config_nickname="my-target-bucket",  # where the new repo is stored
    authorize_virtual_chunk_access={"s3://source-bucket/": "my-zarr-source"},
)
Then parse the native Zarr store into virtual references with VirtualiZarr's ZarrParser and commit them to the repo. The parser reads the source store through an obstore ObjectStore, which the client hands you scoped to the bucket config:
from virtualizarr import open_virtual_dataset
from virtualizarr.parsers import ZarrParser
from obspec_utils.registry import ObjectStoreRegistry

bucket = client.get_bucket_config(org="earthmover", nickname="my-zarr-source")
obj_store = client.get_obstore_for_bucket(org="earthmover", nickname="my-zarr-source")
registry = ObjectStoreRegistry({bucket.url: obj_store})

url = f"{bucket.url}path/to/store.zarr"
vds = open_virtual_dataset(url=url, parser=ZarrParser(), registry=registry)

session = ic_repo.writable_session("main")
vds.vz.to_icechunk(session.store)
session.commit("virtual ingestion of native Zarr store")
See Ingesting Virtual Data for a fuller walkthrough, including reading the data back.
For more on how virtual references work and how access to the source data is authorized, see the docs on virtual chunks.
Open a Repo
If you're working in Python, you can open a Repo and start interacting with your data.
- Python
- Python (asyncio)
repo = client.get_repo("earthmover/ocean")
arepo = await aclient.get_repo("earthmover/ocean") # returns an AsyncRepo object
List Repos
You can list repos associated with an organization.
- Web App
- CLI
- Python
- Python (asyncio)
To browse repositories, navigate to your org's repositories page.
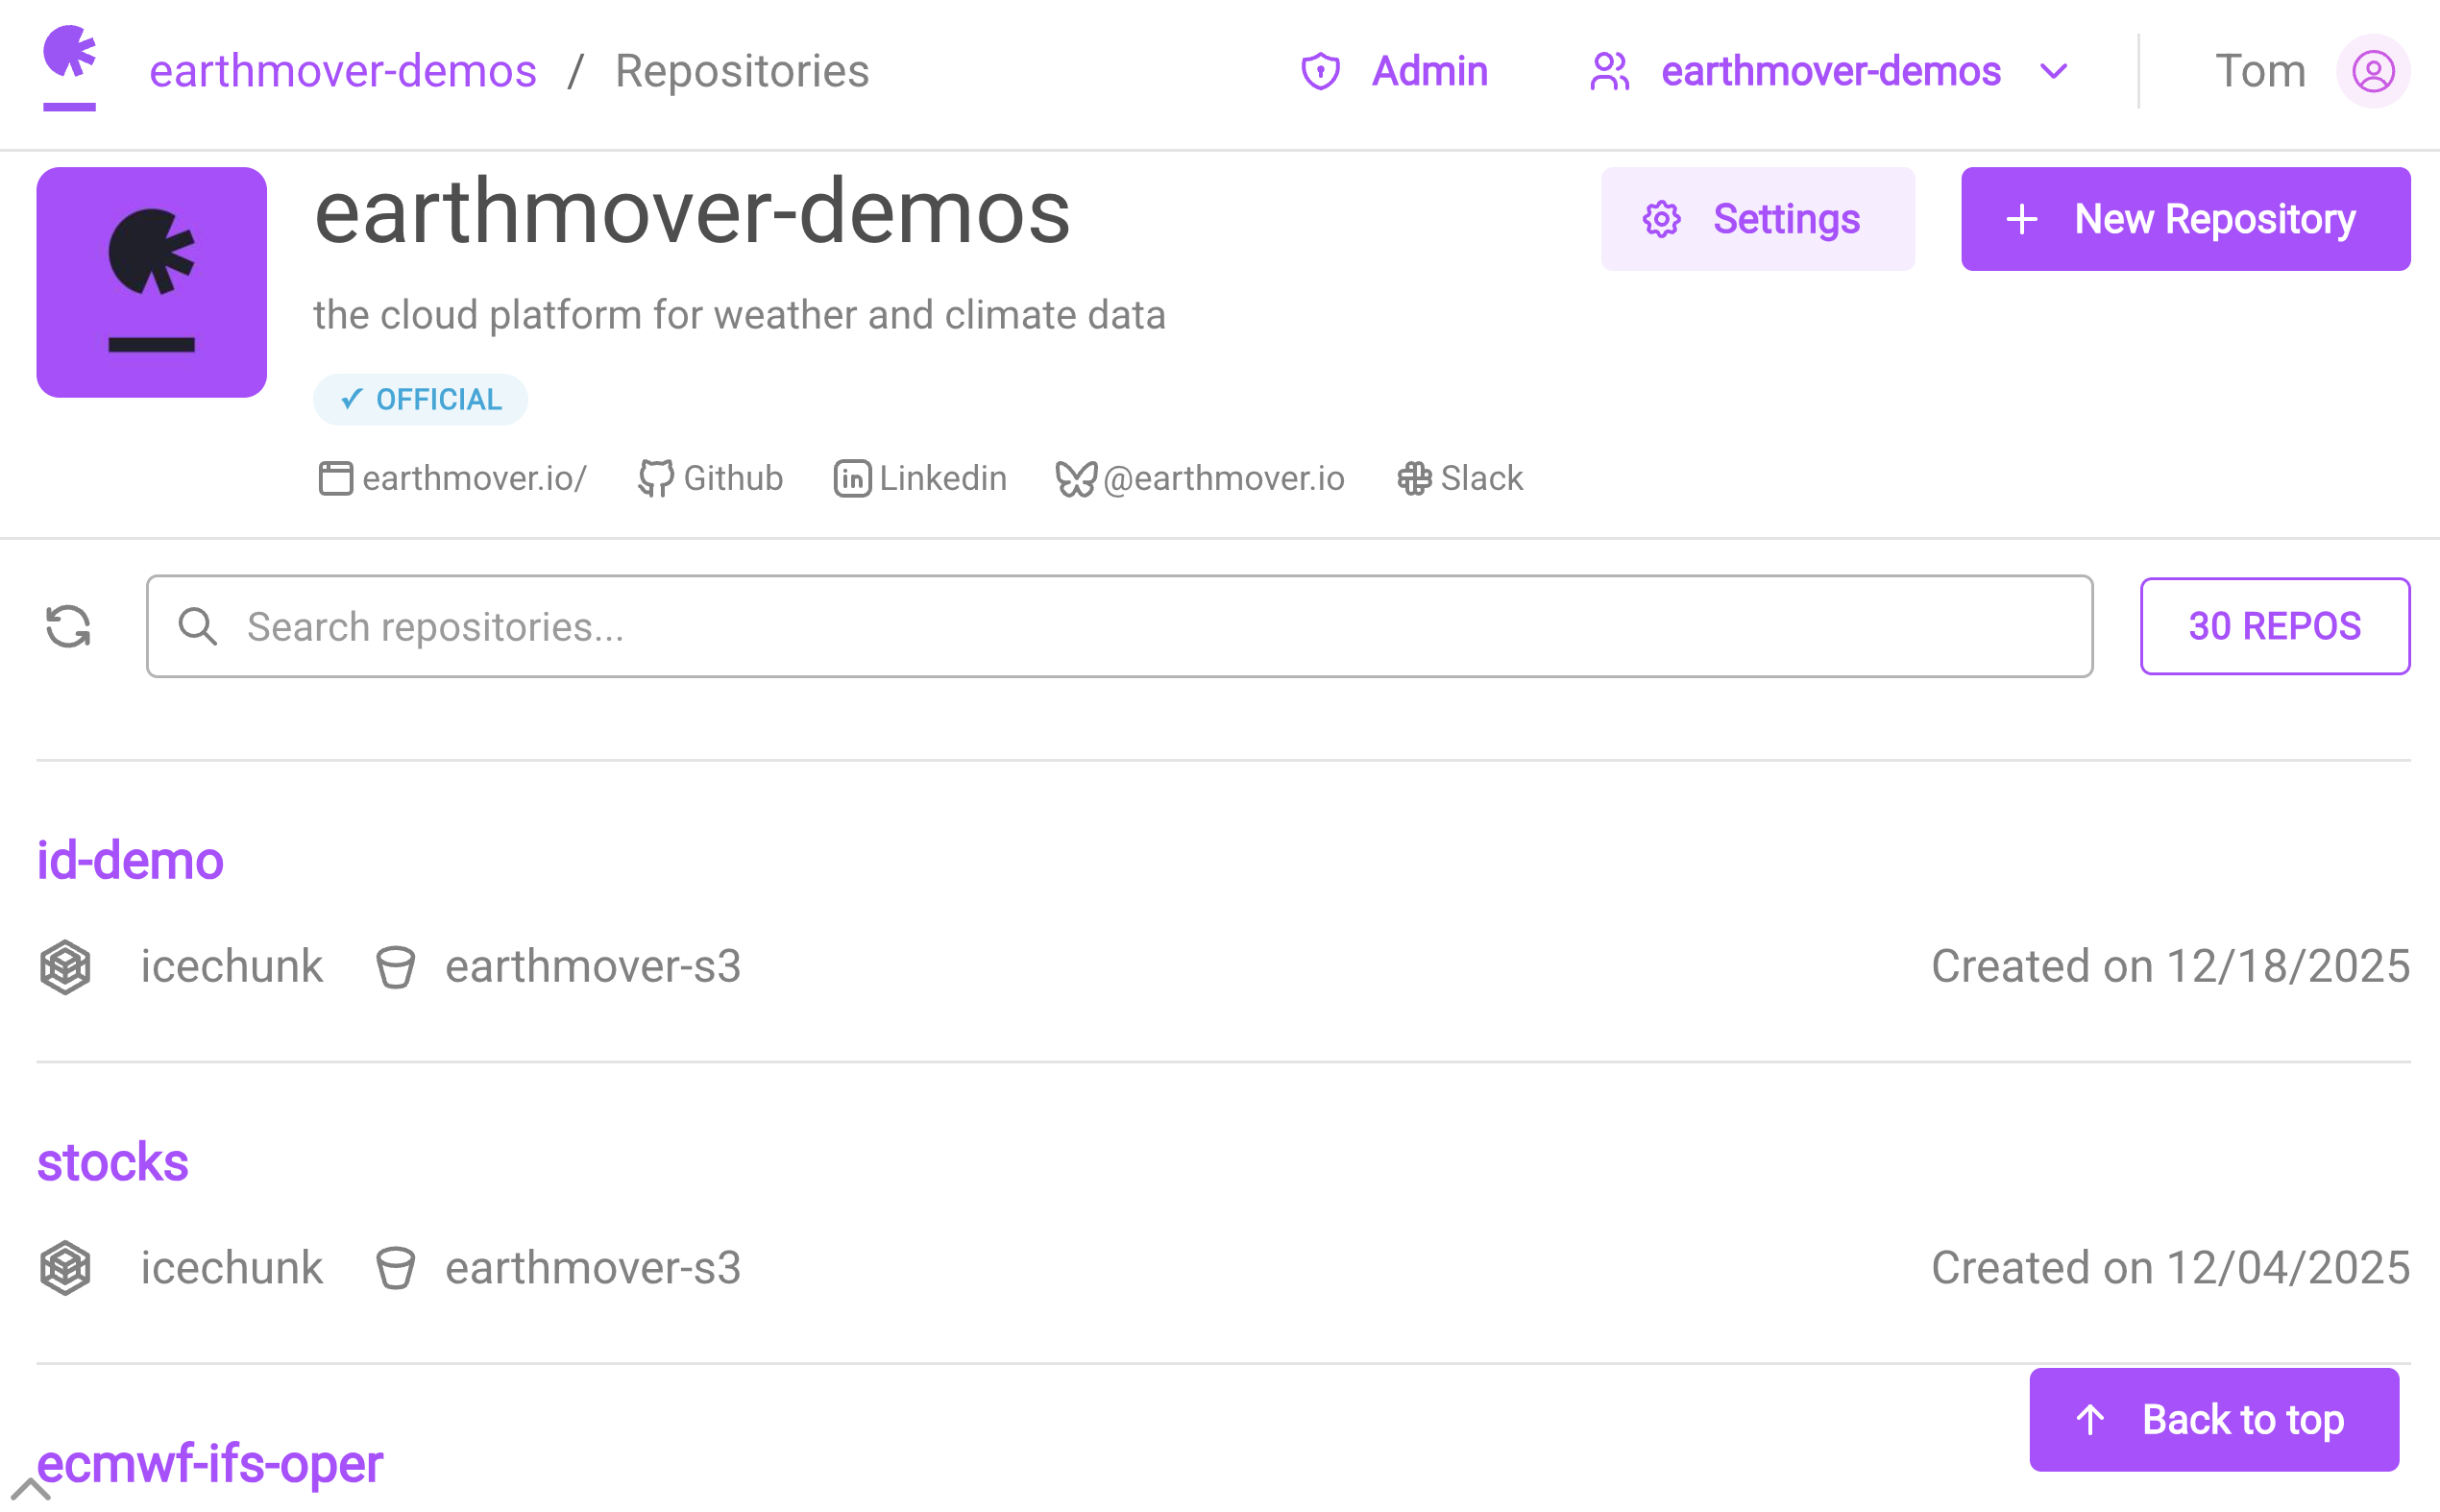
Viewing a list of your org's repositories in the web app.
arraylake repo list earthmover
client.list_repos("earthmover")
await aclient.list_repos("earthmover")
You can also filter repos on repo metadata.
- Web App
- CLI
- Python
- Python (asyncio)
In the web app, you can use the search bar in your org's Repositories page.
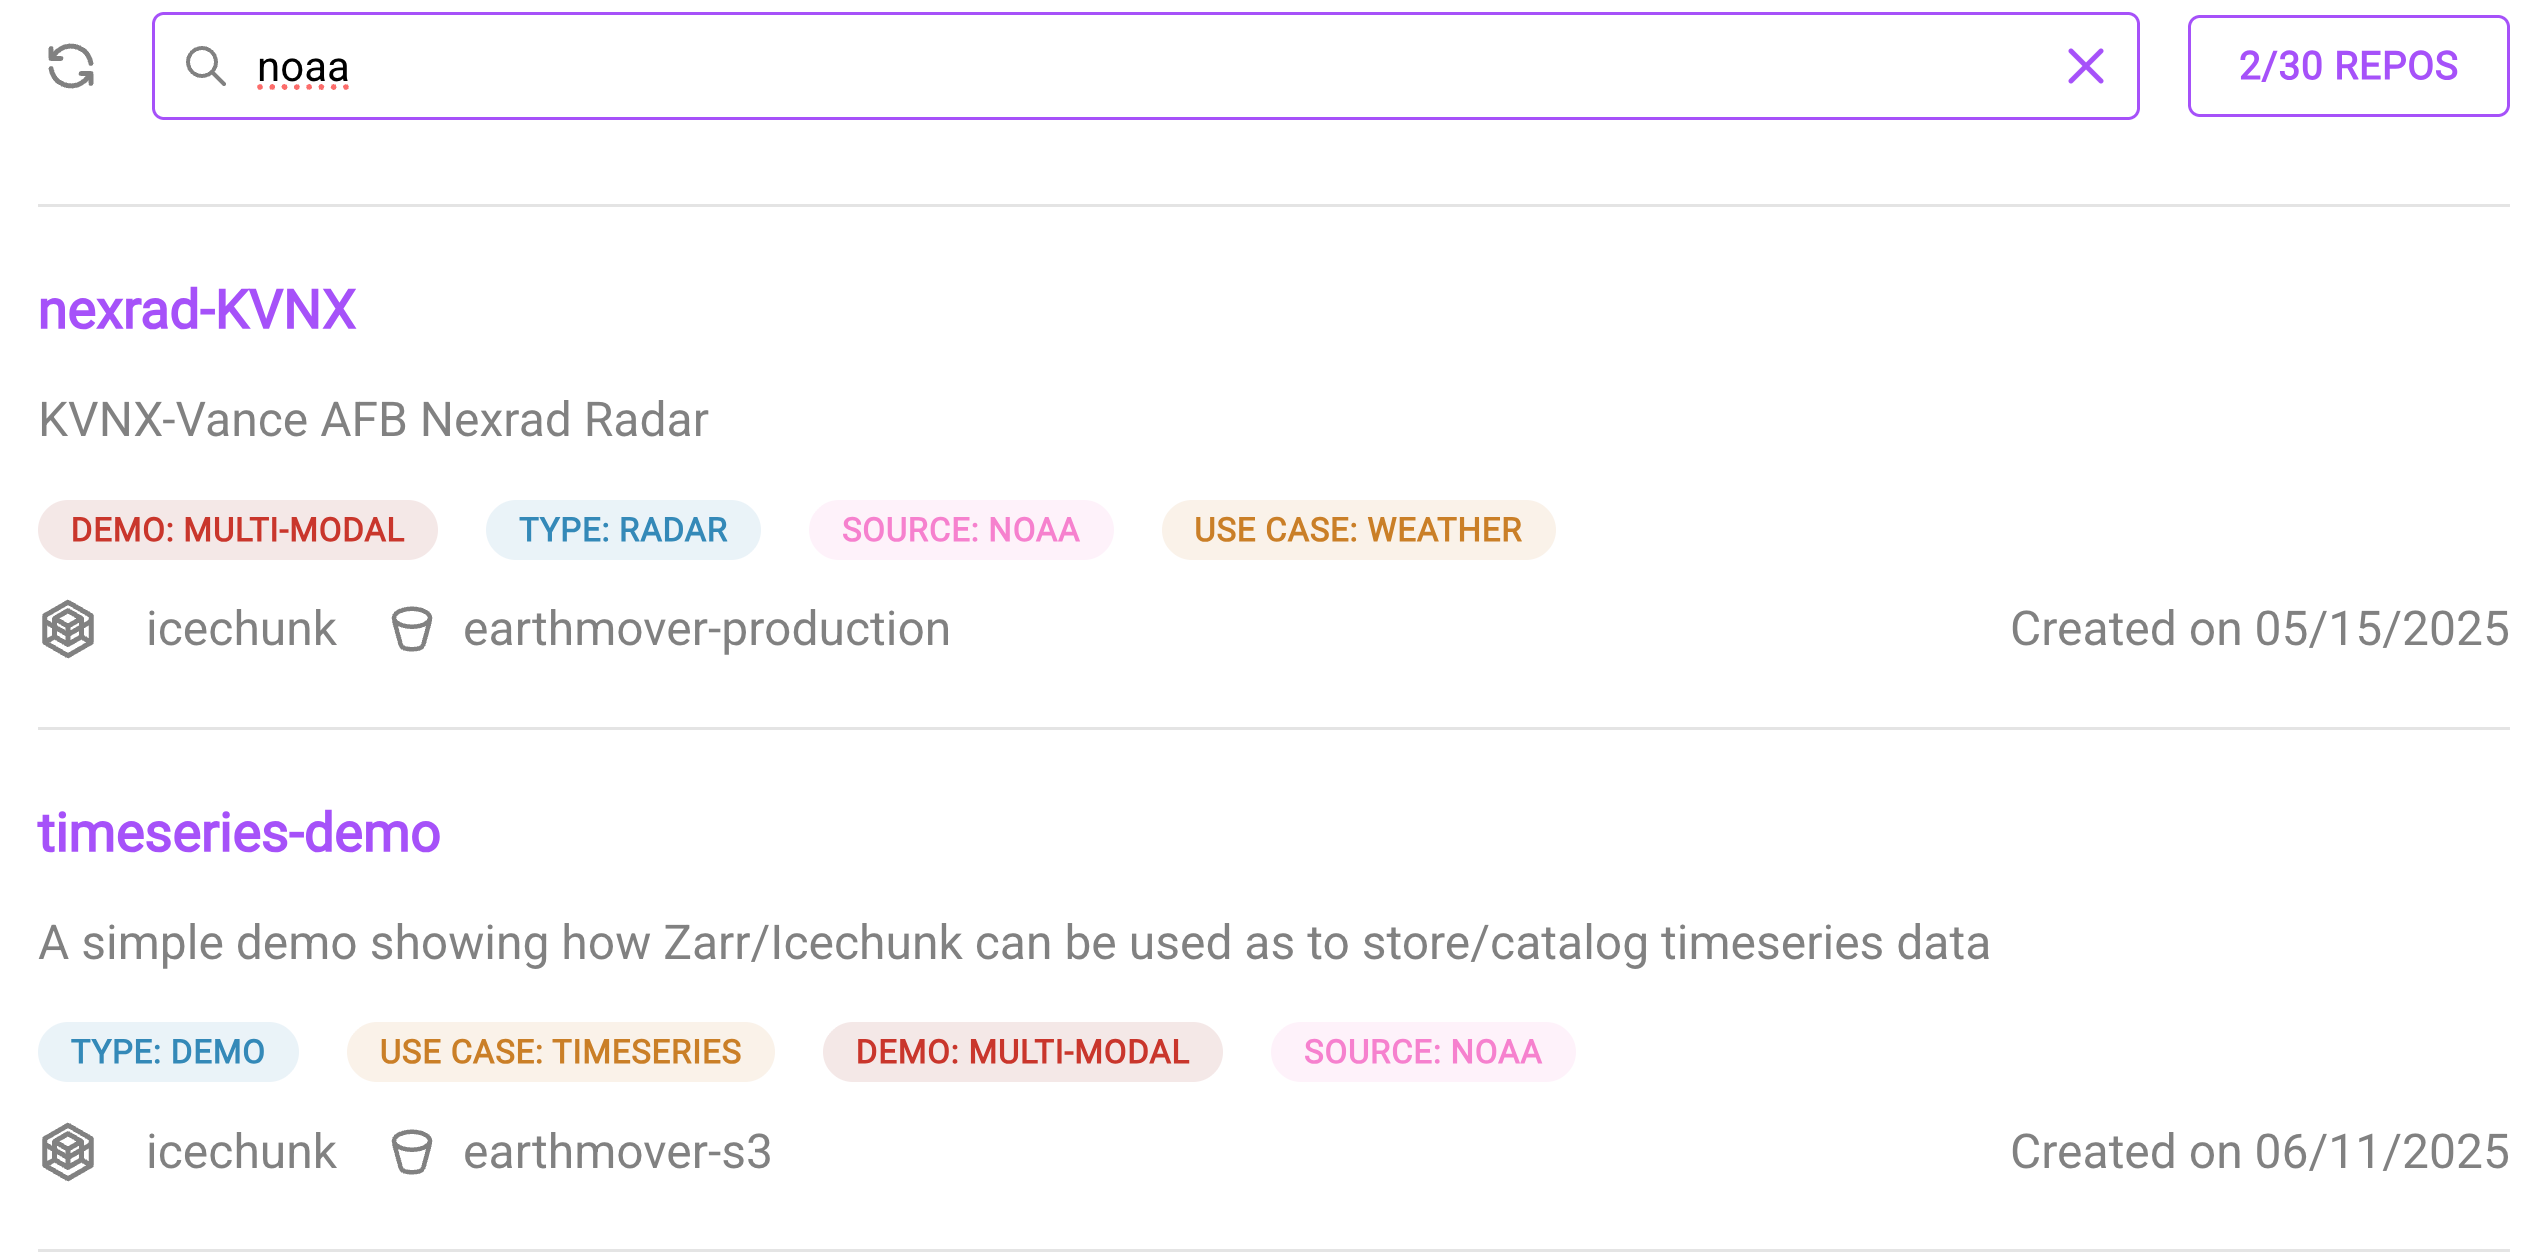
Searching the list of your org's repositories in the web app.
Metadata filters must be a mapping of key-value pairs where values are strings, numbers, lists, booleans, or None.
Filtering is inclusive and will return repos that match all of the provided metadata.
arraylake repo list earthmover --filter-metadata '{"source": "NOAA"}'
Metadata filters must be a mapping of key-value pairs where values are strings, numbers, lists, booleans, or None.
Filtering is inclusive and will return repos that match all of the provided metadata.
client.list_repos("earthmover", filter_metadata={"source": "NOAA"})
Metadata filters must be a mapping of key-value pairs where values are strings, numbers, lists, booleans, or None.
Filtering is inclusive and will return repos that match all of the provided metadata.
await aclient.list_repos("earthmover", filter_metadata={"source": "NOAA"})
Delete a Repo
Finally, we can delete a repo.
Deleting a repo cannot be undone! Use this operation carefully.
- Web App
- CLI
- Python
- Python (asyncio)
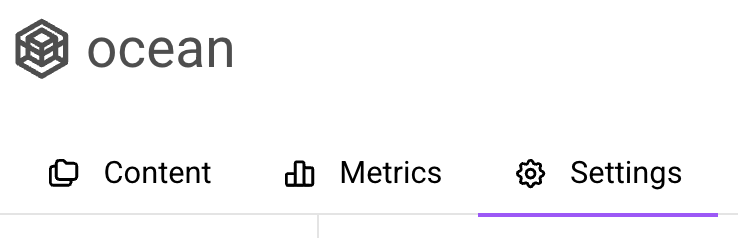
Navigate to the Settings tab of your Repo:
The settings tab of a repo in the web app.
Scroll to the bottom, and hit Delete Repository.
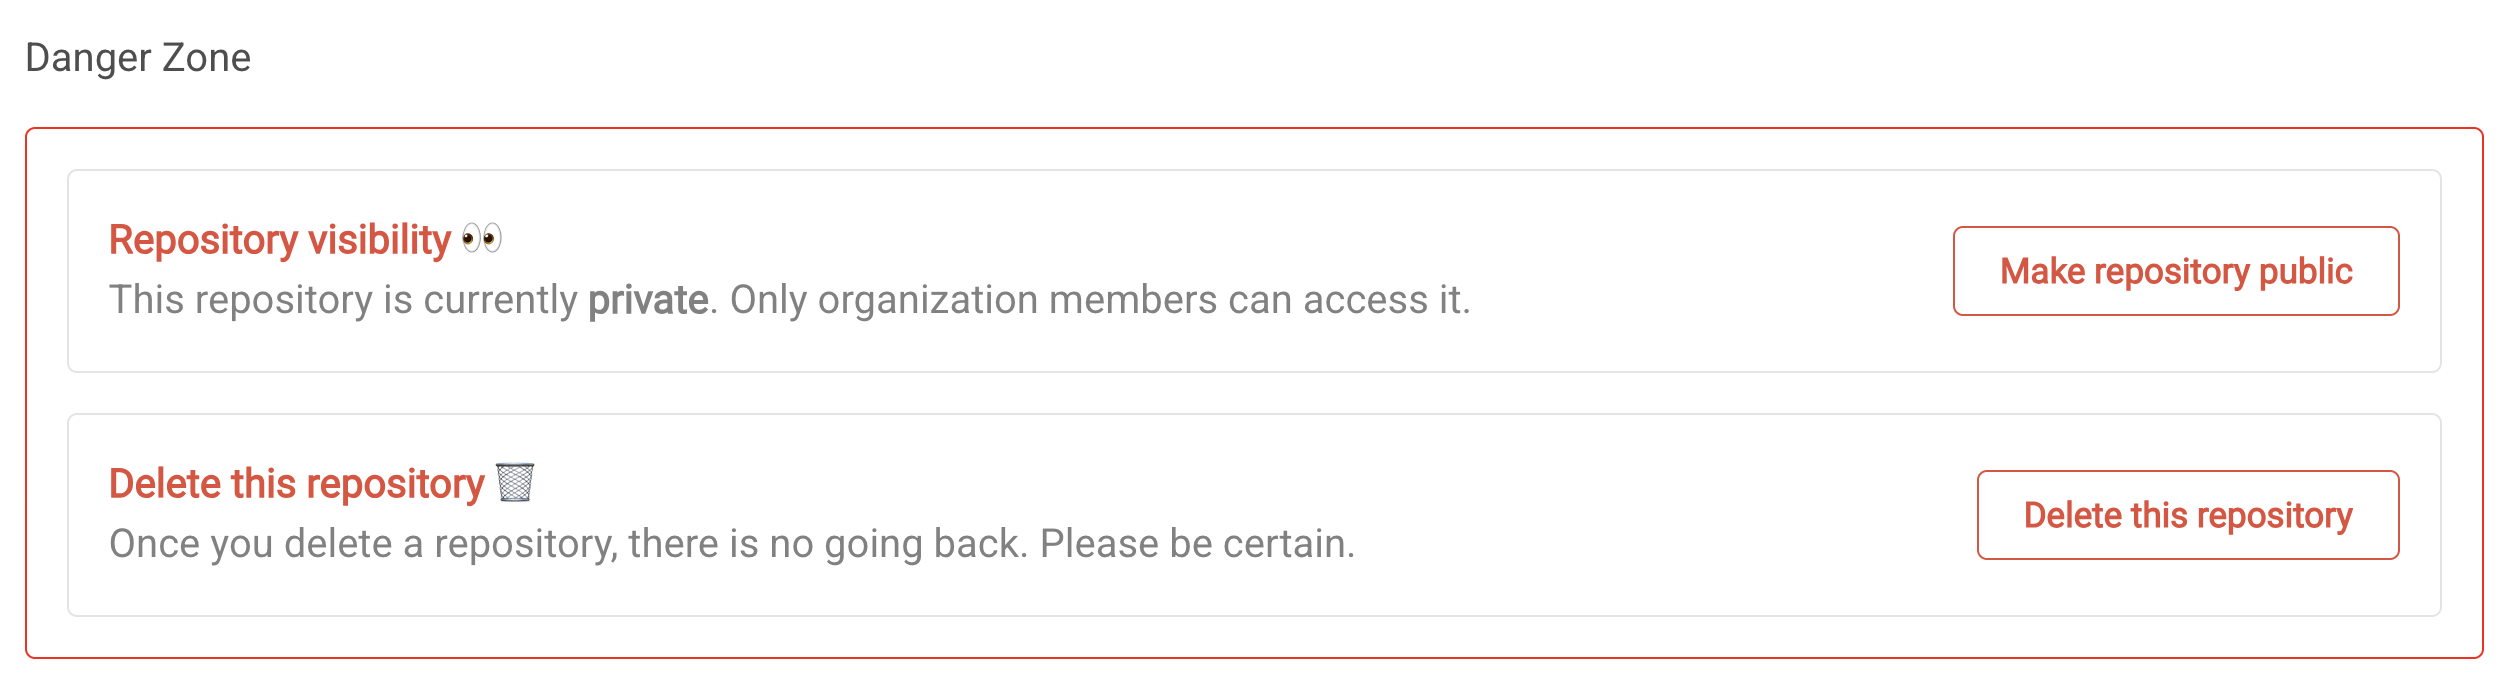
Deleting a Repostory via the web app.
arraylake repo delete earthmover/ocean
client.delete_repo("earthmover/ocean", imsure=True, imreallysure=True)
await aclient.delete_repo("earthmover/ocean", imsure=True, imreallysure=True)