JASMIN Object Store
JASMIN Object Store is an S3-compatible object storage service provided by the JASMIN data analysis facility, managed by STFC on behalf of NERC. JASMIN supports the UK environmental science community with compute and storage for large-scale data analysis. Arraylake integrates with JASMIN Object Store via the S3-compatible API. You can use JASMIN Object Store as the storage location for your organization.
For general information on configuring storage and managing repositories, see the Manage Storage and Manage Repositories guides. This page covers the specific settings required to get JASMIN working with Arraylake.
Prerequisites
1. Get a JASMIN Object Store Account
If you do not already have a JASMIN object store account, you will need to request one.
You can view all your active JASMIN services in the JASMIN Accounts Portal.

2. Note your Object Store project name
Your JASMIN object store project name will be used to construct the S3 endpoint URL. In this example, the project name is earthmover-aria-o.
3. Create a bucket and S3 access keys
Navigate to the JASMIN Object Store Portal to create a bucket and access keys. For detailed instructions, see the JASMIN Object Store documentation.
Create a bucket: Follow the instructions to create a bucket and note down the bucket name — in this example, we use jasmin-demo.
Create access keys: Click "Manage Object Store > Create Key" under your object store project. Give the key a descriptive name that makes sense for your use case (e.g. earthmover).
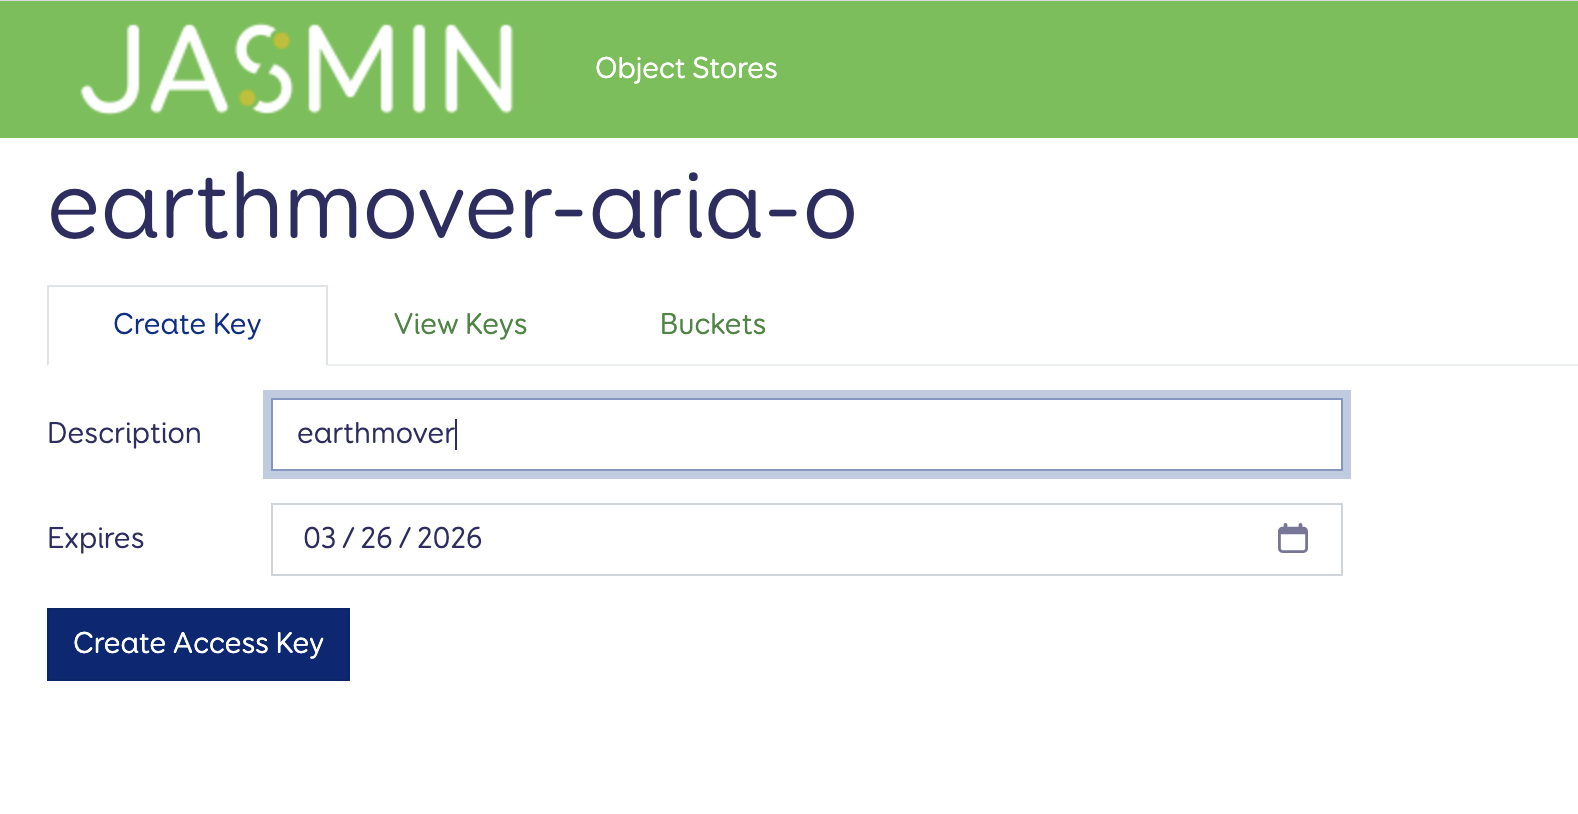
Once you click OK, the secret key will no longer be visible in the JASMIN portal. Make sure to either verify that the key works (see below) or save the access key and secret key to a secure location such as a password manager.
HMAC credentials (access key and secret access key) are long-lived and grant direct access to your bucket. Handle them carefully — avoid embedding them in notebooks or scripts that may be shared. For guidance on securely managing credentials and understanding the risks, see Manage Storage.
Configure Arraylake
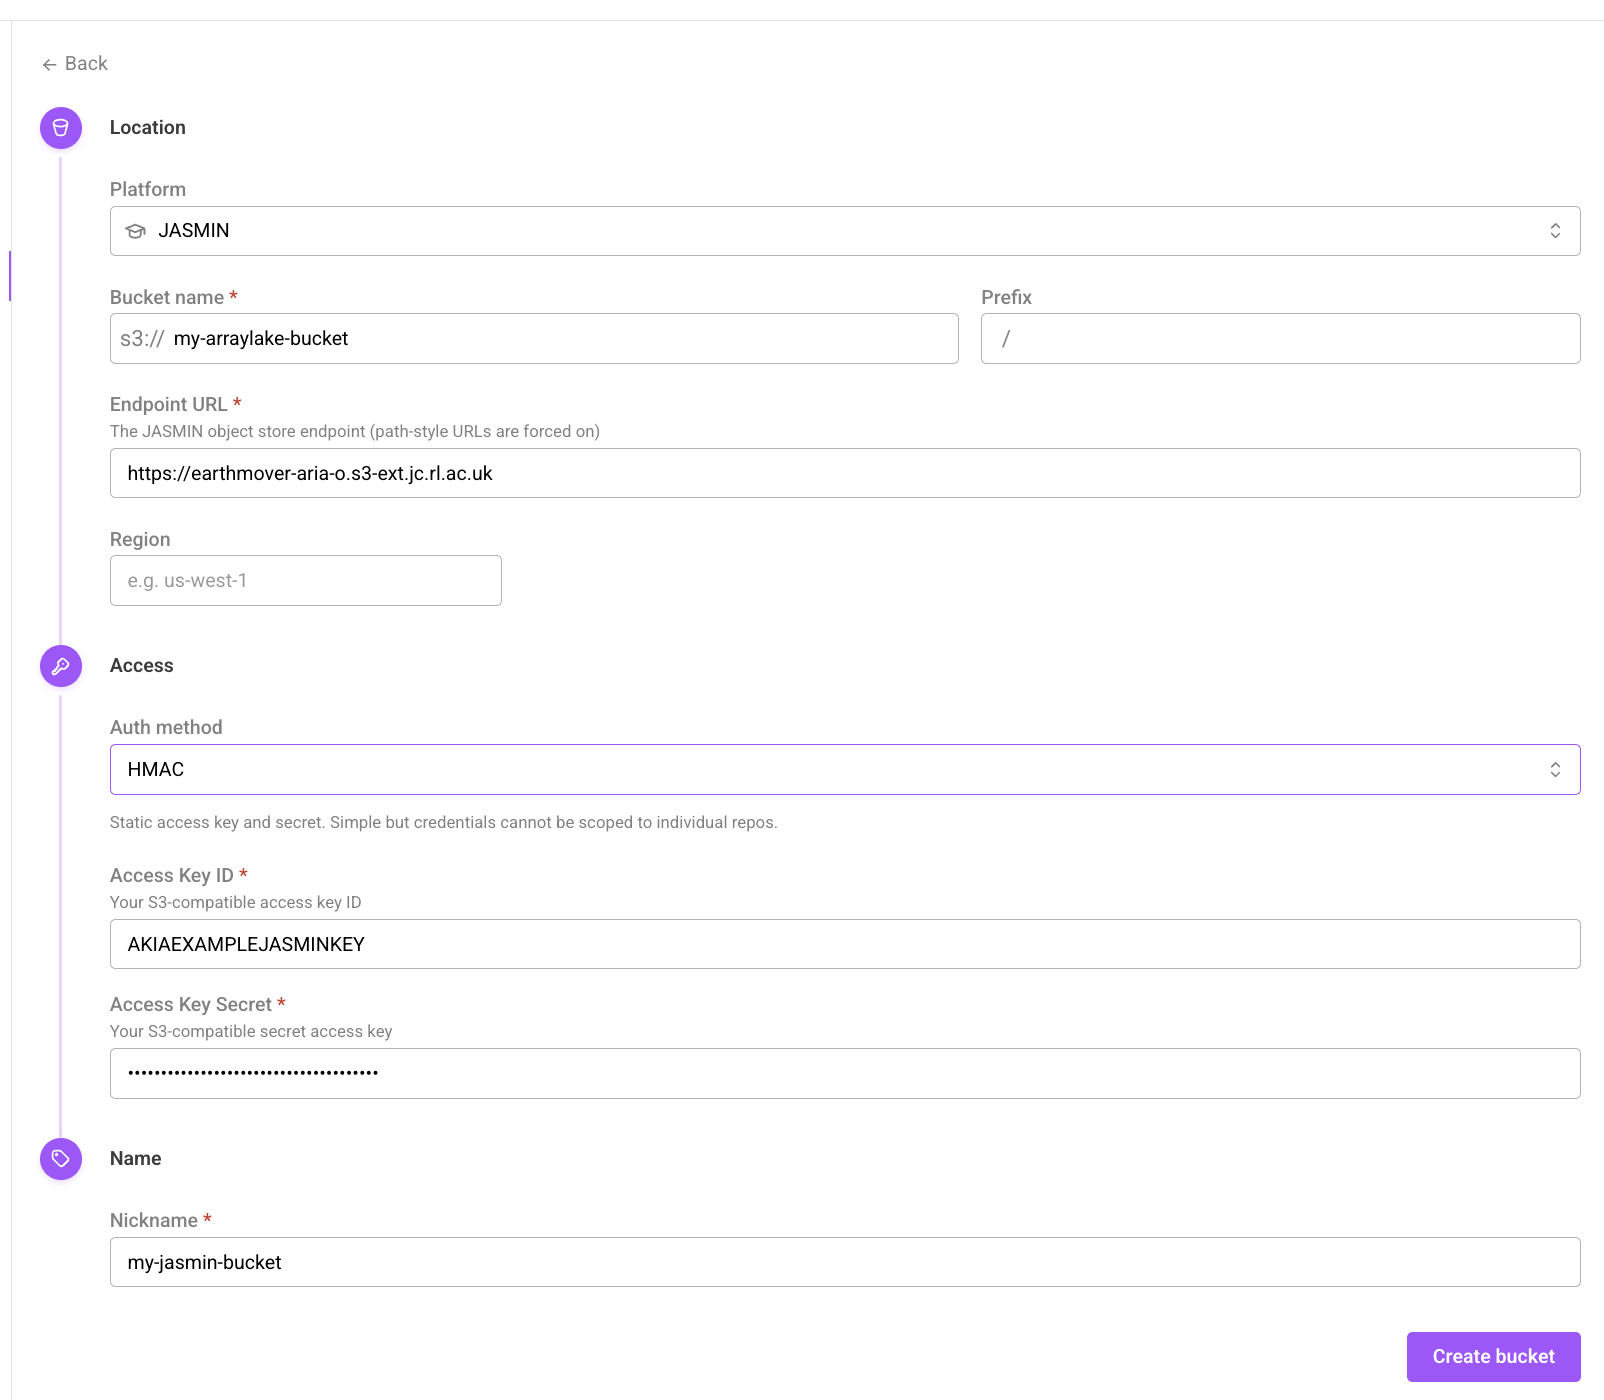
Create a new BucketConfig to store the configuration for this bucket using either the Arraylake Python client or web app.
When configuring, use the following values:
- Platform: S3 compatible
- Bucket: The bucket you created in your project (e.g.
jasmin-demo) - Credentials: HMAC
- Access Key / Secret Access Key: The keys you created above
- Endpoint URL:
https://<project_name>.s3-ext.jc.rl.ac.uk(e.g.https://earthmover-aria-o.s3-ext.jc.rl.ac.uk)
- Web App
- Python
Add a new JASMIN Object Store bucket
from arraylake import Client
credentials = ... # e.g. load from a json or env variables

client = Client()

client.create_bucket_config(
  org="my-org",
  nickname="my-jasmin-bucket",
  uri="s3://jasmin-demo",
  extra_config={
      'endpoint_url': 'https://earthmover-aria-o.s3-ext.jc.rl.ac.uk',
      'force_path_style': True,
      'unsafe_use_conditional_update': False,
      'unsafe_use_conditional_create': False,
  },
  auth_config={
      'access_key_id': credentials['access_key'],
      'secret_access_key': credentials['secret_access_key'],
      'method': 'hmac',
  }
)
That's it! You're ready to create a Repository! 🎉